You can test for a bad check valve by turning the engine off, waiting 30 minutes and then, without starting the engine, moving the HVAC control to a new position, listening for movement under the dash, indicating that stored vacuum is still present. If you hear nothing, good chance the check valve has failed. The HVAC controls should normally operate the controls after sitting a day or more.
[Note: The default vent setting is to the defrost vents. So the air is still flowing, it’s just not where you may want it. As an aside, you should set the vent control to off before turning off the engine in cold weather to keep air out of the passenger compartment]
The check valve/vacuum canister cannot be replaced by mere mortals. This why Ford charges $900 labor to do it.
You can Google for other DIY fixes, you will find thousands of hits. There are also YouTube's on the subject. I have not found any of them that speak to me. Of course, you may not find my fix to be understandable. Here is one from the Sportsmobile Forum.
The following describes a DIY procedure to save $900. In this procedure, we locate both ends of the hose and abandon the middle inaccessible section.
Parts:
Dorman Vacuum Reservoir
[If this is a dead link, Google for Vacuum Reservoir]
5 feet of 5/32 inch Vacuum Hose
On the E-series, the vacuum supply line runs from a port on the intake manifold, disappearing behind A/C components and exiting through the firewall near the passenger footwell.
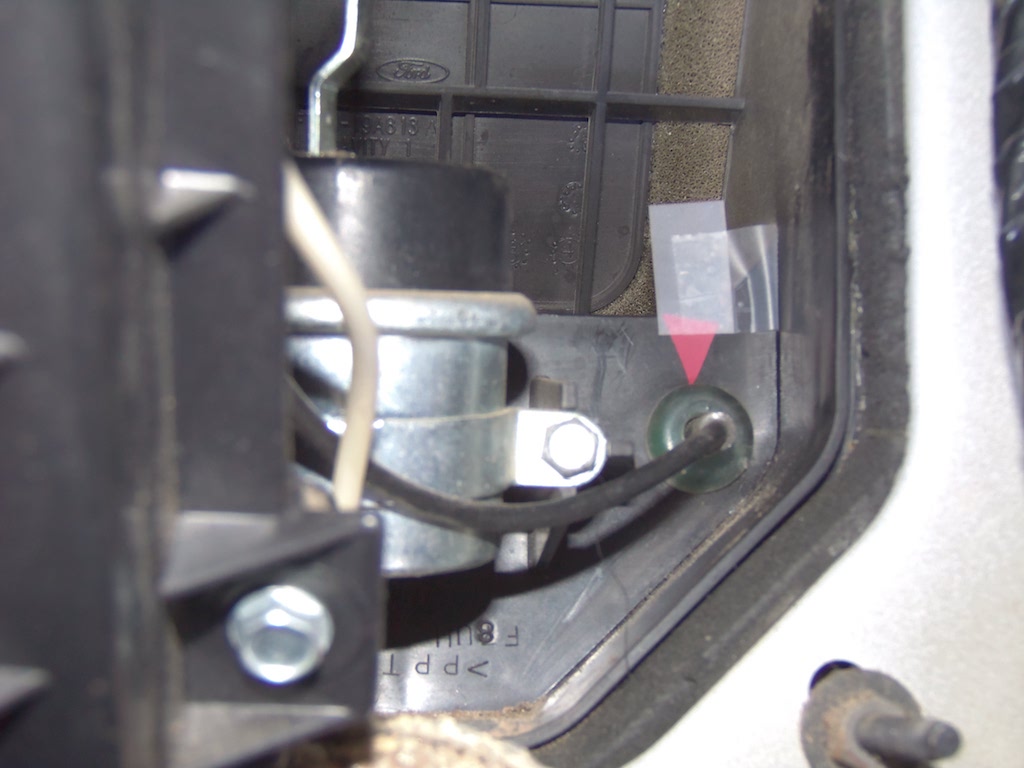
1) Look for a 1/8" black plastic hose. One end leads to the intake manifold. The other end leads toward to passenger side of the firewall.
Here is a photo with the hose marked with red tape.

We will return here later.
2) Pull the plastic cover off the right side of the passenger foot well to gain access to the other end of the vacuum hose. What you are looking for is marked with the red tape.

Cut the existing hose close to the firewall. With a small flat blade screwdriver, remove the plastic grommet protecting the hose from the firewall. This will allow you to pull the hose out an inch or so where you will find another fitting slightly larger than the grommet hose. Cut on the other side of the grommet. Say goodbye to the old hose.
3) Now snake something through the grommet hose to the other side of the firewall to be able to pull a new hose through the firewall. I found that my coiled fish tape was too flexible for this purpose. I used a 2-foot long metal shirt hanger straightened out with a U on one the leading side. The angle that worked for me was inserting it through the hole from a 2 to an 8 o’clock position.
For this step, you need to be over 6 feet tall or use a stool so you can see straight down behind the battery. The snake will exit the firewall below the battery. Follow the wiper fluid fill tube down and you will see an electrical connector on the firewall. The snake will exit below that connector. You will be able to see it, but not touch it. When the DW got the U on the snake where I could see it, I used another shirt hanger also with a U on the end and grabbed the other U and pulled it up.
Now you can pull the hose from the passenger compartment to the engine compartment. I made a slit in the hose and inserted the U in my homemade snake through it so it could be pulled through.
Now insert the 1/8 hose from the manifold into the 5/32 hose.
Start the engine and test for vacuum. It's not a big suck, but you can feel it.
4) The reservoir has an inlet and outlet nozzles, but it's not marked which is which. The 5/32 hose (the one you just pulled through the firewall fits one of the nozzles, but it's not the right one. Cut a short piece from the 1/8 hose you cut off, stick it in the 5/32 hose and the other into the cannister. Just reverse that for the other nozzle.
Don't overtighten any hose clamps, it easy to compress the 1/8 hose and cut off air flow.
You should now test for air flow from the dash vents.
5) Now you need to locate the reservoir out of the way of feet. I elected to remove the small vertical dash panel just in front of the seat. The dash panel is mounted to an easily removed steel plate. Pull the plastic gently from the bottom.

Behind that plate is a home for the reservoir. I used Dual Lock to secure it to a plastic cover. By using Dual Lock I can remove it if I ever need to.

Secure the hose with quick ties and button everything up.
6) Enjoy cool air from dash vents.